Bread-o-lution - March Black Pumpernickel
Month three of my Bread-o-lution project, and to be perfectly honest I am finding it a bit hard to keep it up. Partly due to quite difficult breads I have chosen and partly due to, well, being a working mum. I have also started a parenting (read ranting) blog which is taking some of my time as well.
So, this month’s project is pumpernickel – this is not new new recipe for me, as I have tried it twice before, but just wasn’t happy with the results.
I made my very first pumpernickel following Nancy Silverton’s recipe – it turned out way too dry, and with very gummy feel to it – most of it ended up in a bin :(
The second attempt was made following Andrew Whitley recipe from “Bread Matters”, and even though the result was edible, it wasn’t quite what I was after – the bread was too light, not enough salt in it and it went all moldy only two days after I baked it.
This time I was determined to do it right and spent most of the month doing the research. As always, good old TheFreshLoaf turned out to be the best source ever. I looked at these blogs by dmsnyder and ananda, which had the easiest to follow and had the best pictures. As always, I changed a couple of things just a little bit, and here is the end result :
Sourdough Black Pumpernickel
Starter
200g 100% hydration rye/wholemeal sourdough starter
Rye berries soaker
140g rye berries
250g water
Old bread soaker
140g old bread – preferably rye or brown
160g water
Dough
All of starter above
All of berries above (drained)
All of old bread above (squeeze out as much water as possible)
175g rye chops
220g white flour
275g sping water
1 level tsp of dry yeast
12g salt
25g black molasses
I didn’t start planning for this bread in time, and have been working mainly with wholemeal starter. I’ve only refreshed the starter with rye flour for a couple of days before I started on this loaf, so it was somewhat of an in-between wholemeal and rye starter.
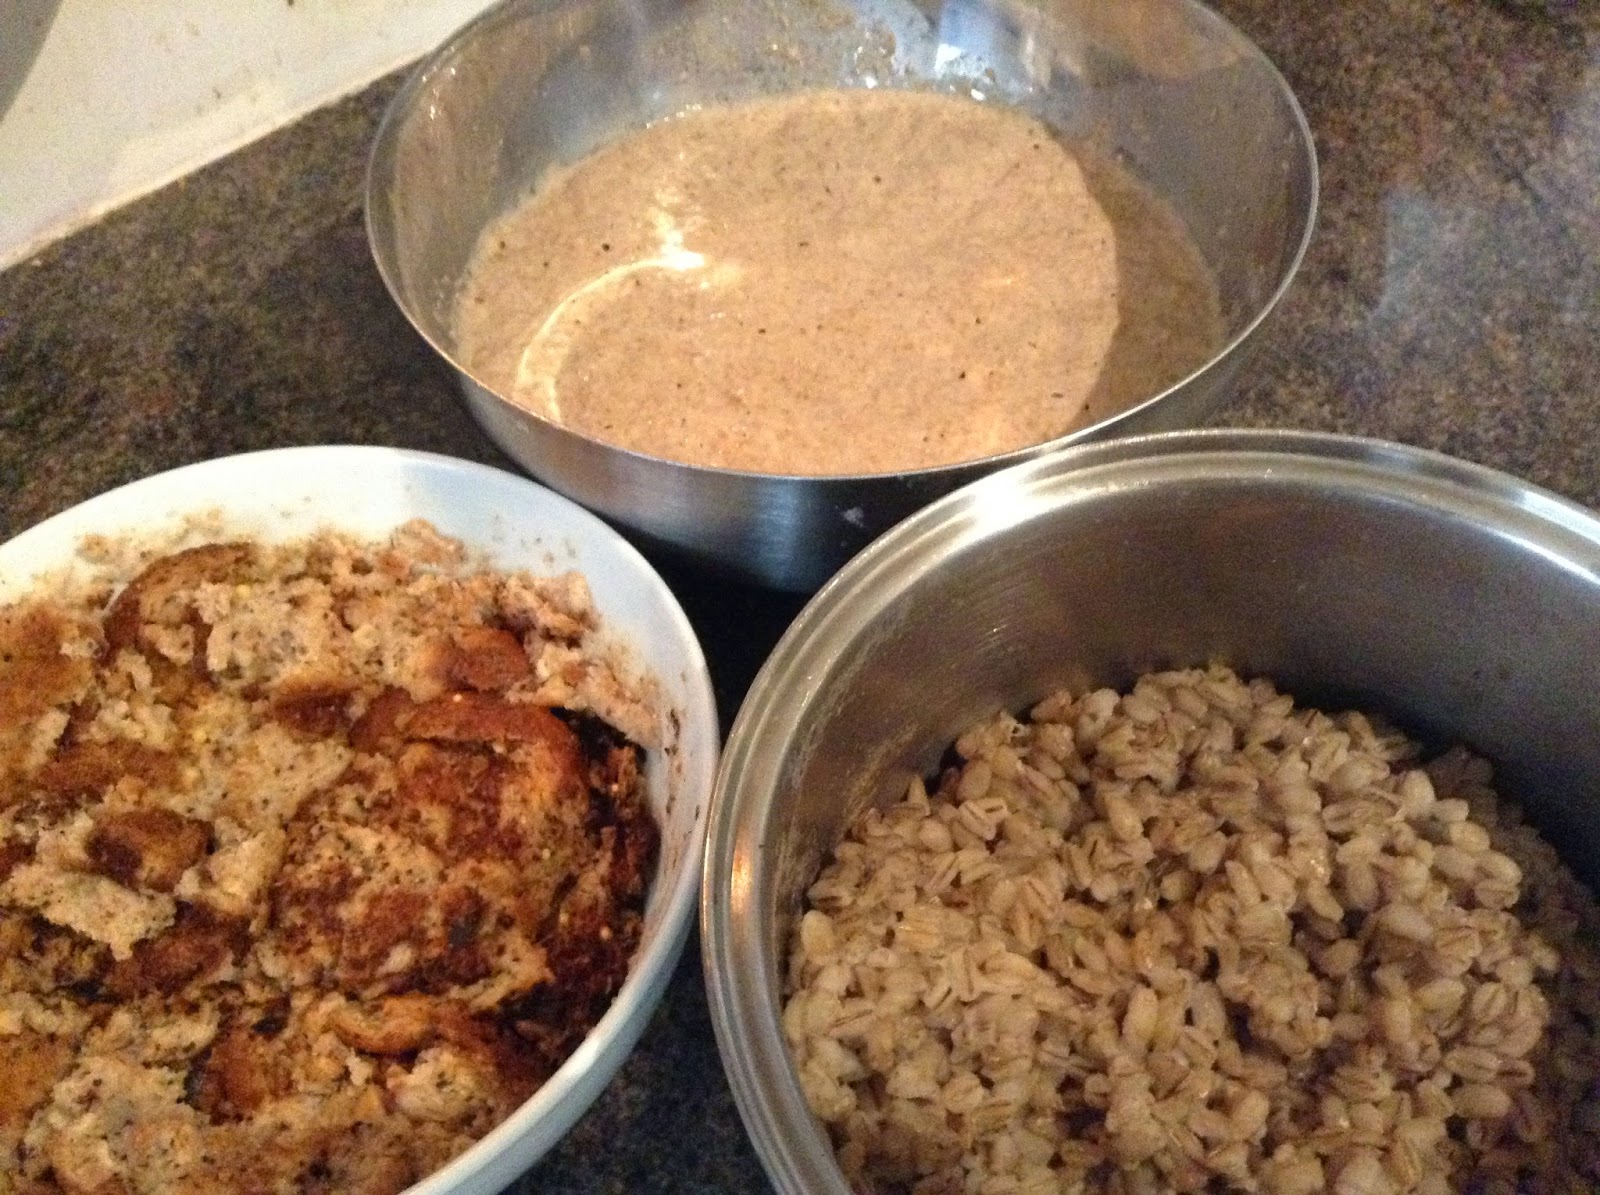
Soak rye berries overnight and boil them for about an hour or until they are properly cooked – I think it took about 40 minutes in my case. Skim any grey form that forms on the top.
Cut old bread in cubes and soak overnight. I didn’t have any rye or sourdough bread in the house, so I ended up using some old shop-bought bread, and I think some of it was plain white bread too. But it would definitely be better to keep some slices of old rye bread in the freezer for this reason exactly – I will need to remember to do it for next time
 Next day
Drain rye berries and leave to dry for a couple of hours. Squeeze as much of water out of bread soaker (hardly any water came out of mine). Mix starter and both soakers in a large bowl and mix until everything is evenly distributed and you have a mix of a regular texture.
.JPG) Add the rest of the ingredients and mix everything together with a large spoon for 5 minutes or until it comes together. I am sure you can mix this dough in a mixer as well, but my lovely KitchenAid is still broken :( Plus the dough is really wet, and feels almost fragile and I would be afraid to over-mix it.
Cover with clingfilm and leave to rest for 40 minutes at room temperature.
Add the rest of the ingredients and mix everything together with a large spoon for 5 minutes or until it comes together. I am sure you can mix this dough in a mixer as well, but my lovely KitchenAid is still broken :( Plus the dough is really wet, and feels almost fragile and I would be afraid to over-mix it.
Cover with clingfilm and leave to rest for 40 minutes at room temperature.
.JPG) Oil your kitchen top slightly to prevent the dough from sticking and pour it out on the counter top. Divide the dough into two equal pieces and shape them into cylinders. “Shape” might be a bit of an optimistic way to describe it, you pretty much just roll the dough to form a thick sausage.
Oil your kitchen top slightly to prevent the dough from sticking and pour it out on the counter top. Divide the dough into two equal pieces and shape them into cylinders. “Shape” might be a bit of an optimistic way to describe it, you pretty much just roll the dough to form a thick sausage.
Most of the recipes call for a Pullman loaf tip to give you that traditional flat top shape of pumpernickel. And whilst its something that I do have on my wishlist, I wasn’t going to buy one just for this recipe. I ended up using two of my 900g square side loaf tins – one narrow and long and the other one wide and short. Old the tins and line them with parchment paper.
.JPG)
Place the shaped loaves into loaf tins, cover with clingfilm and leave to prove for 1 – 1.5 at room temperature. As soon as you start little bubbles forming in the dough and some bubbles trying to “break” through the top of the loaves – they are ready.
 Tear two large pieces of foil (large enough to fit over a loaf tin), run one side with a bit of vegetable oil and cover each tin with a piece of foil (oiled side down). Crimp foil around the edges of the tin to form a sealed “lid”.
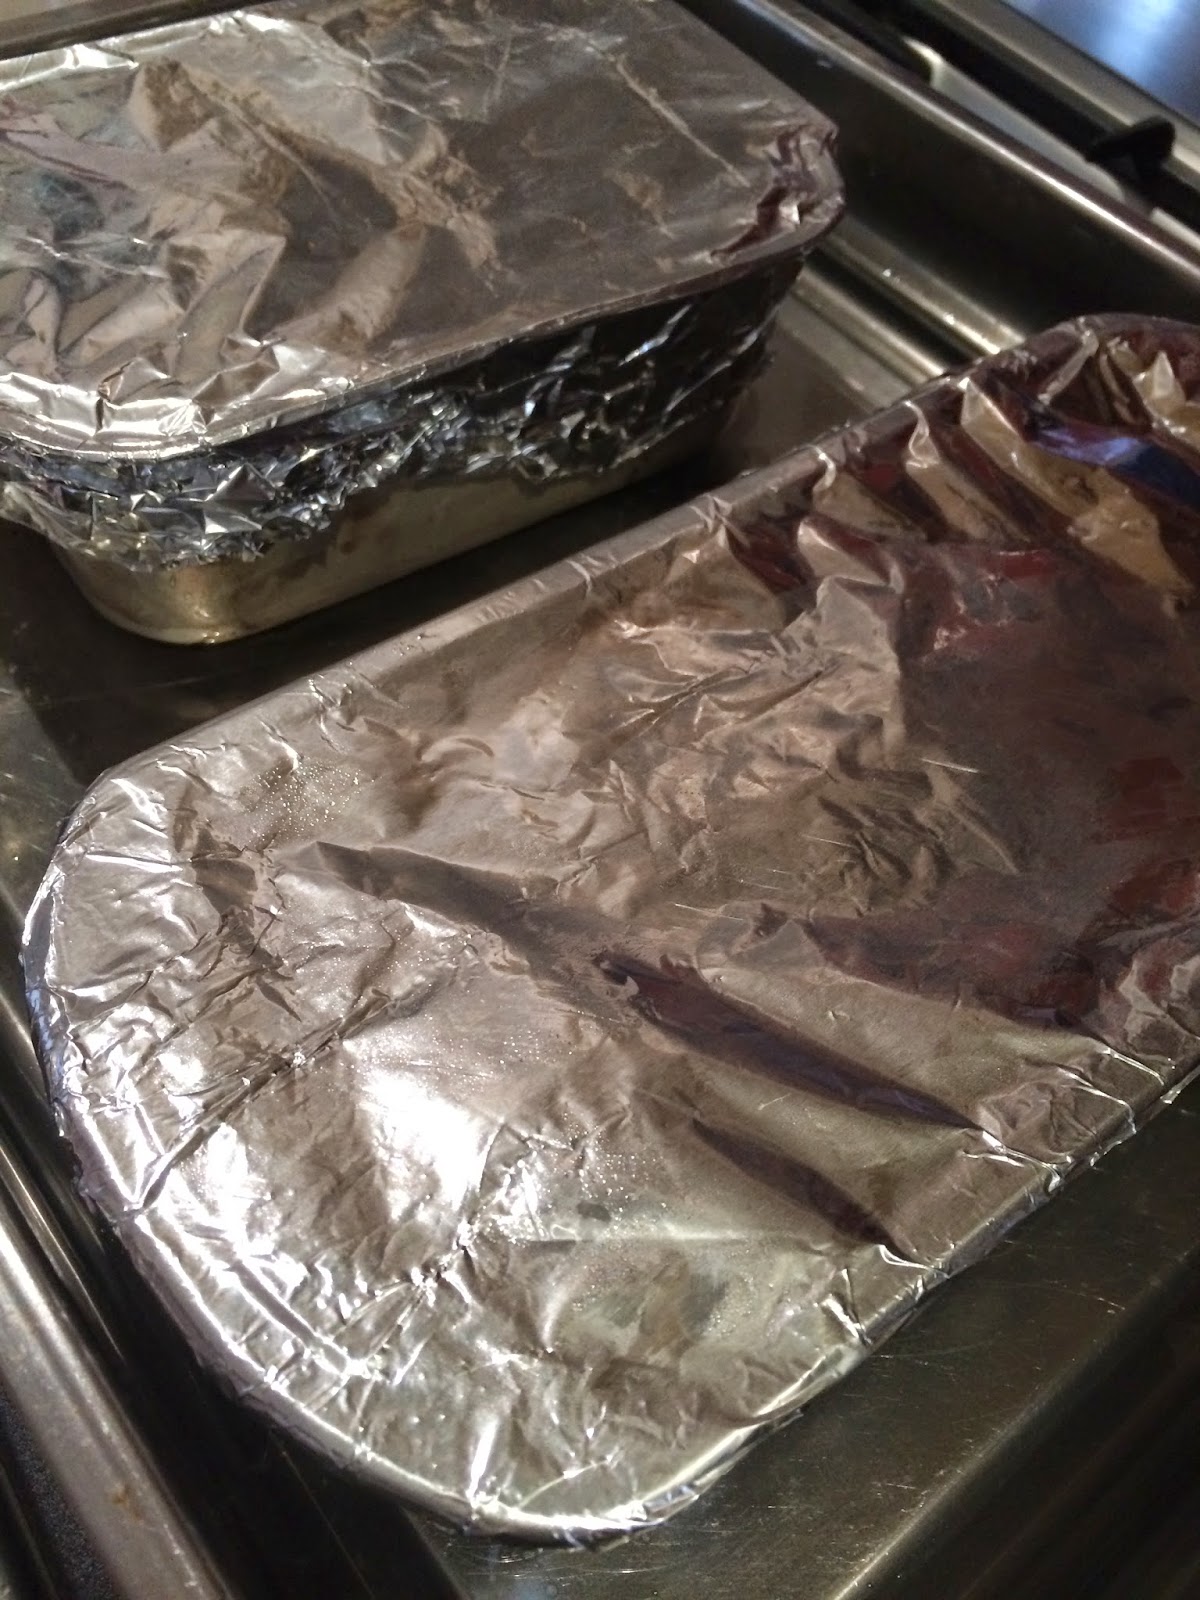
Preheat the oven to 180C (fan). Take a large baking tray – place both loaf tins in the tray side by side and fill the tray with water – about half way.
Bake loaves for 1 hour, check the water level and top up if required.
Turn the oven down to 130C and bake for another 3.5 hours. Turn the oven off and leave the loaves in overnight or for at least 8-12 hours, without opening the oven door.
Take the loaves out, wrap them in clean kitchen towels and leave to rest for 24 hours.

Slice very thinly and enjoy with some hard cheddar and onion or some cream cheese and salmon

Overall thoughts :
- my make-shift Pullman pan idea worked well, I ended up with reasonably flat top loaves
- I could have baked the loaves for another 15-20 minutes easily, but I was worried about them becoming too dry
- when the loaves came out of the oven, the colour was a bit un-even at the bottoms, but 24 hours later they wend rich dark brown all over
- thin and long loaf tin produced better bread than short and wide one
- I could cut down on molasses by 5g or so, molasses flavour was a bit too strong for me
- I need to cut bread for bread soaker in smaller pieces, as now and then I’d come across a “chunk” of old bread
- But all in all, this is a wonderful bread, and I wish I sliced and froze some to use as a soaker for next time
- I will definitely make it again
So, this month’s project is pumpernickel – this is not new new recipe for me, as I have tried it twice before, but just wasn’t happy with the results.
I made my very first pumpernickel following Nancy Silverton’s recipe – it turned out way too dry, and with very gummy feel to it – most of it ended up in a bin :(
The second attempt was made following Andrew Whitley recipe from “Bread Matters”, and even though the result was edible, it wasn’t quite what I was after – the bread was too light, not enough salt in it and it went all moldy only two days after I baked it.
This time I was determined to do it right and spent most of the month doing the research. As always, good old TheFreshLoaf turned out to be the best source ever. I looked at these blogs by dmsnyder and ananda, which had the easiest to follow and had the best pictures. As always, I changed a couple of things just a little bit, and here is the end result :
Sourdough Black Pumpernickel
Starter
200g 100% hydration rye/wholemeal sourdough starter
Rye berries soaker
140g rye berries
250g water
Old bread soaker
140g old bread – preferably rye or brown
160g water
Dough
All of starter above
All of berries above (drained)
All of old bread above (squeeze out as much water as possible)
175g rye chops
220g white flour
275g sping water
1 level tsp of dry yeast
12g salt
25g black molasses
I didn’t start planning for this bread in time, and have been working mainly with wholemeal starter. I’ve only refreshed the starter with rye flour for a couple of days before I started on this loaf, so it was somewhat of an in-between wholemeal and rye starter.
Soak rye berries overnight and boil them for about an hour or until they are properly cooked – I think it took about 40 minutes in my case. Skim any grey form that forms on the top.
Cut old bread in cubes and soak overnight. I didn’t have any rye or sourdough bread in the house, so I ended up using some old shop-bought bread, and I think some of it was plain white bread too. But it would definitely be better to keep some slices of old rye bread in the freezer for this reason exactly – I will need to remember to do it for next time
Drain rye berries and leave to dry for a couple of hours. Squeeze as much of water out of bread soaker (hardly any water came out of mine). Mix starter and both soakers in a large bowl and mix until everything is evenly distributed and you have a mix of a regular texture.
Most of the recipes call for a Pullman loaf tip to give you that traditional flat top shape of pumpernickel. And whilst its something that I do have on my wishlist, I wasn’t going to buy one just for this recipe. I ended up using two of my 900g square side loaf tins – one narrow and long and the other one wide and short. Old the tins and line them with parchment paper.
Place the shaped loaves into loaf tins, cover with clingfilm and leave to prove for 1 – 1.5 at room temperature. As soon as you start little bubbles forming in the dough and some bubbles trying to “break” through the top of the loaves – they are ready.
Preheat the oven to 180C (fan). Take a large baking tray – place both loaf tins in the tray side by side and fill the tray with water – about half way.
Bake loaves for 1 hour, check the water level and top up if required.
Turn the oven down to 130C and bake for another 3.5 hours. Turn the oven off and leave the loaves in overnight or for at least 8-12 hours, without opening the oven door.
Take the loaves out, wrap them in clean kitchen towels and leave to rest for 24 hours.
Slice very thinly and enjoy with some hard cheddar and onion or some cream cheese and salmon
Overall thoughts :
- my make-shift Pullman pan idea worked well, I ended up with reasonably flat top loaves
- I could have baked the loaves for another 15-20 minutes easily, but I was worried about them becoming too dry
- when the loaves came out of the oven, the colour was a bit un-even at the bottoms, but 24 hours later they wend rich dark brown all over
- thin and long loaf tin produced better bread than short and wide one
- I could cut down on molasses by 5g or so, molasses flavour was a bit too strong for me
- I need to cut bread for bread soaker in smaller pieces, as now and then I’d come across a “chunk” of old bread
- But all in all, this is a wonderful bread, and I wish I sliced and froze some to use as a soaker for next time
- I will definitely make it again
Hi. Thanks for this - it's very useful to follow someone through the process of baking a specific type of bread. Could I ask what the "white flour" is that you referred to in the ingredients list? Is it white wheat flour or white (sieved) rye flour? Thanks! Isabel
ReplyDeleteIsabel, its just white bread flour
ReplyDeleteRye comes from the starter, so it needs a bit of gluten from the white wheat flour to hold it together